Hey 👋 new reader,
Pluralsight gave me some free1 month
, get them before
subscriptions
they are gone!
The First Website I Built
15 Nov 2017 · 6 mins read Edit PostAmazing Tees
January 2013 I made my first website. It was simple. It only had one job. That job, was to design and print t-shirts.
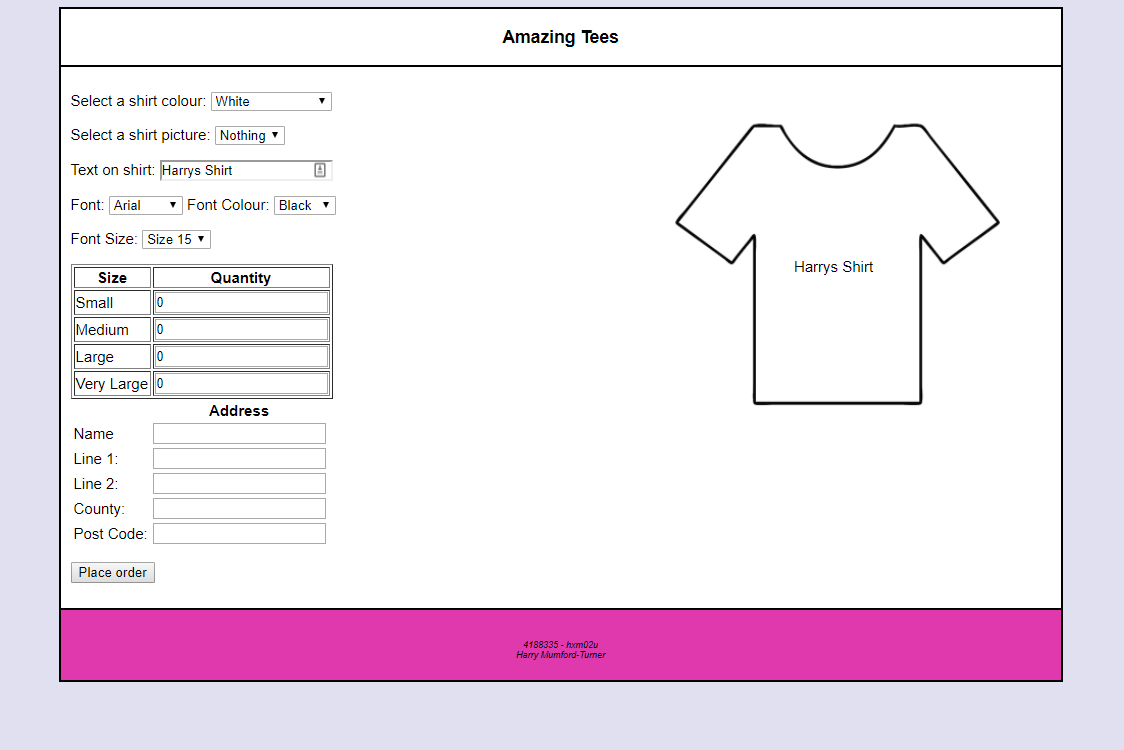
The website was submitted as part of my Computer Science University first year module Web Programming and Scripting in 2012-2013.
I received 86.5% for the coursework (a first) - the marker must’ve enjoyed my use of the default css color: pink.
Improving it
I decided to improve it and see what I have learnt after 4 years and 1.1 million lines of code later.
Step 1. Move to HTML5
Out with HTML4
<!DOCTYPE html PUBLIC "-//W3C//DTD HTML 4.01//EN"
"http://www.w3.org/TR/html4/strict.dtd">
<html>
<head>
  <script type="text/javascript"></script>

  <link href="css/shop.css" rel="stylesheet" type="text/css">
</head>
</html>
In with HTML5
<!doctype html>
<html>
<head>
  <script></script>

  <link href="css/shop.css" rel="stylesheet">
</head>
</html>
Step 2. Indentation
Reformatting indentation so it all looks the same surprisingly makes a difference with code readability.
For example:
<form action="index.html" >
<p><input type="submit" value="Place order" onClick="makeorder"></p>
Looks much better like:
<form action="index.html">
<p>
  <input type="submit" value="Place order" onClick="makeorder">
</p>
Step 3. Separate JS from HTML
The site had all of its JavaScript files in <script> tags in the HTML. I moved these to their own separate file.
<script src="js/main.js"></script>
Step 4. Move from CSS to SASS
CSS preprocessors give so many more additions to CSS, such as variables, nesting and functions. I renamed shop.css to main.scss and set it up to process to main.css. This was processed using CodeKit.
<link href="css/main.css" rel="stylesheet">
Step 5. Minify CSS and JS
Compressing your javascript and css decreases load time of your site. I used an application called CodeKit to minify this process.
<link href="css/main.css" rel="stylesheet">
<script src="js/main.min.js"></script>
Minified CSS
/* main.css */
body{background-color:#E0E0F0;font-family:Arial;font-size:15px}#container{margin:auto;width:80%;min-width:1000px;color:#000;background-color:#FFF;border:2px double #000}#header{border-bottom:2px double #000;text-align:center;color:#000}#leftcolumn{padding:10px;float:left;position:relative}#righ.....
Minified JavaScript
// main.min.js
function printShirt(){var e=document.getElementById("colourList");document.getElementById("tShirt").style.backgroundColor=e.options[e.selectedIndex].value,"null"!=document.getElementById("pictureList").value?(document.getElementById("pic").src=document.getElementById("pictureList").value,document.getElementById("pic").style.visibility="visible"):document.getElementById("pic").style.visibility="hidden";var t=document.getElementById("shirtText");t.innerHTML=document.getElementById("shirtTextBox")...
Step 6. Move to CSS classes (from ids)
Before the code was littered with ids for styling.
  <div id="container">
    <div id="header">
      <h3>Amazing Tees</h3>
    </div>
    ...
Ids were changed into classes and tags to make the code look more semantic.
  <div class="wrapper">
    <header>
        <h3>Amazing a Tees</h3>
    </header>
Step 7. Used SCSS variables rather than hard coded colors
Before:
body {
  background-color: #E0E0F0;
}
After:
$colour-background: #e0e0f0;

body {
  background-color: $colour-background;
Notice also the change from an uppercase color hexcode to lowercase.
Step 8. Use PHP Templating
The website used PHP, so to make the most out of it, I used templating to separate the header and footer into 2 files that can be referenced on every page.
<!-- index.php -->
<body>
   <?php @include 'templates/header.php' ?>

   ...

   <?php @include 'templates/footer.php' ?>
</body>
Step 9. Remove <table>
Table elements were used too much on this site, possibly because I didn’t know how to center elements using CSS.
  <table summary="Shirt text">
      <tr>
          <td>
              <p class="shirtText" id="shirtText">Harrys Shirt</p>
          </td>
      </tr>
  </table>
After:
<p class="shirttext" id="js-shirt-text">Harrys Shirt</p>
Notice how the id changed from shirtText to js-shirt-text. This highlights what elements are used in javascript for manipulation.
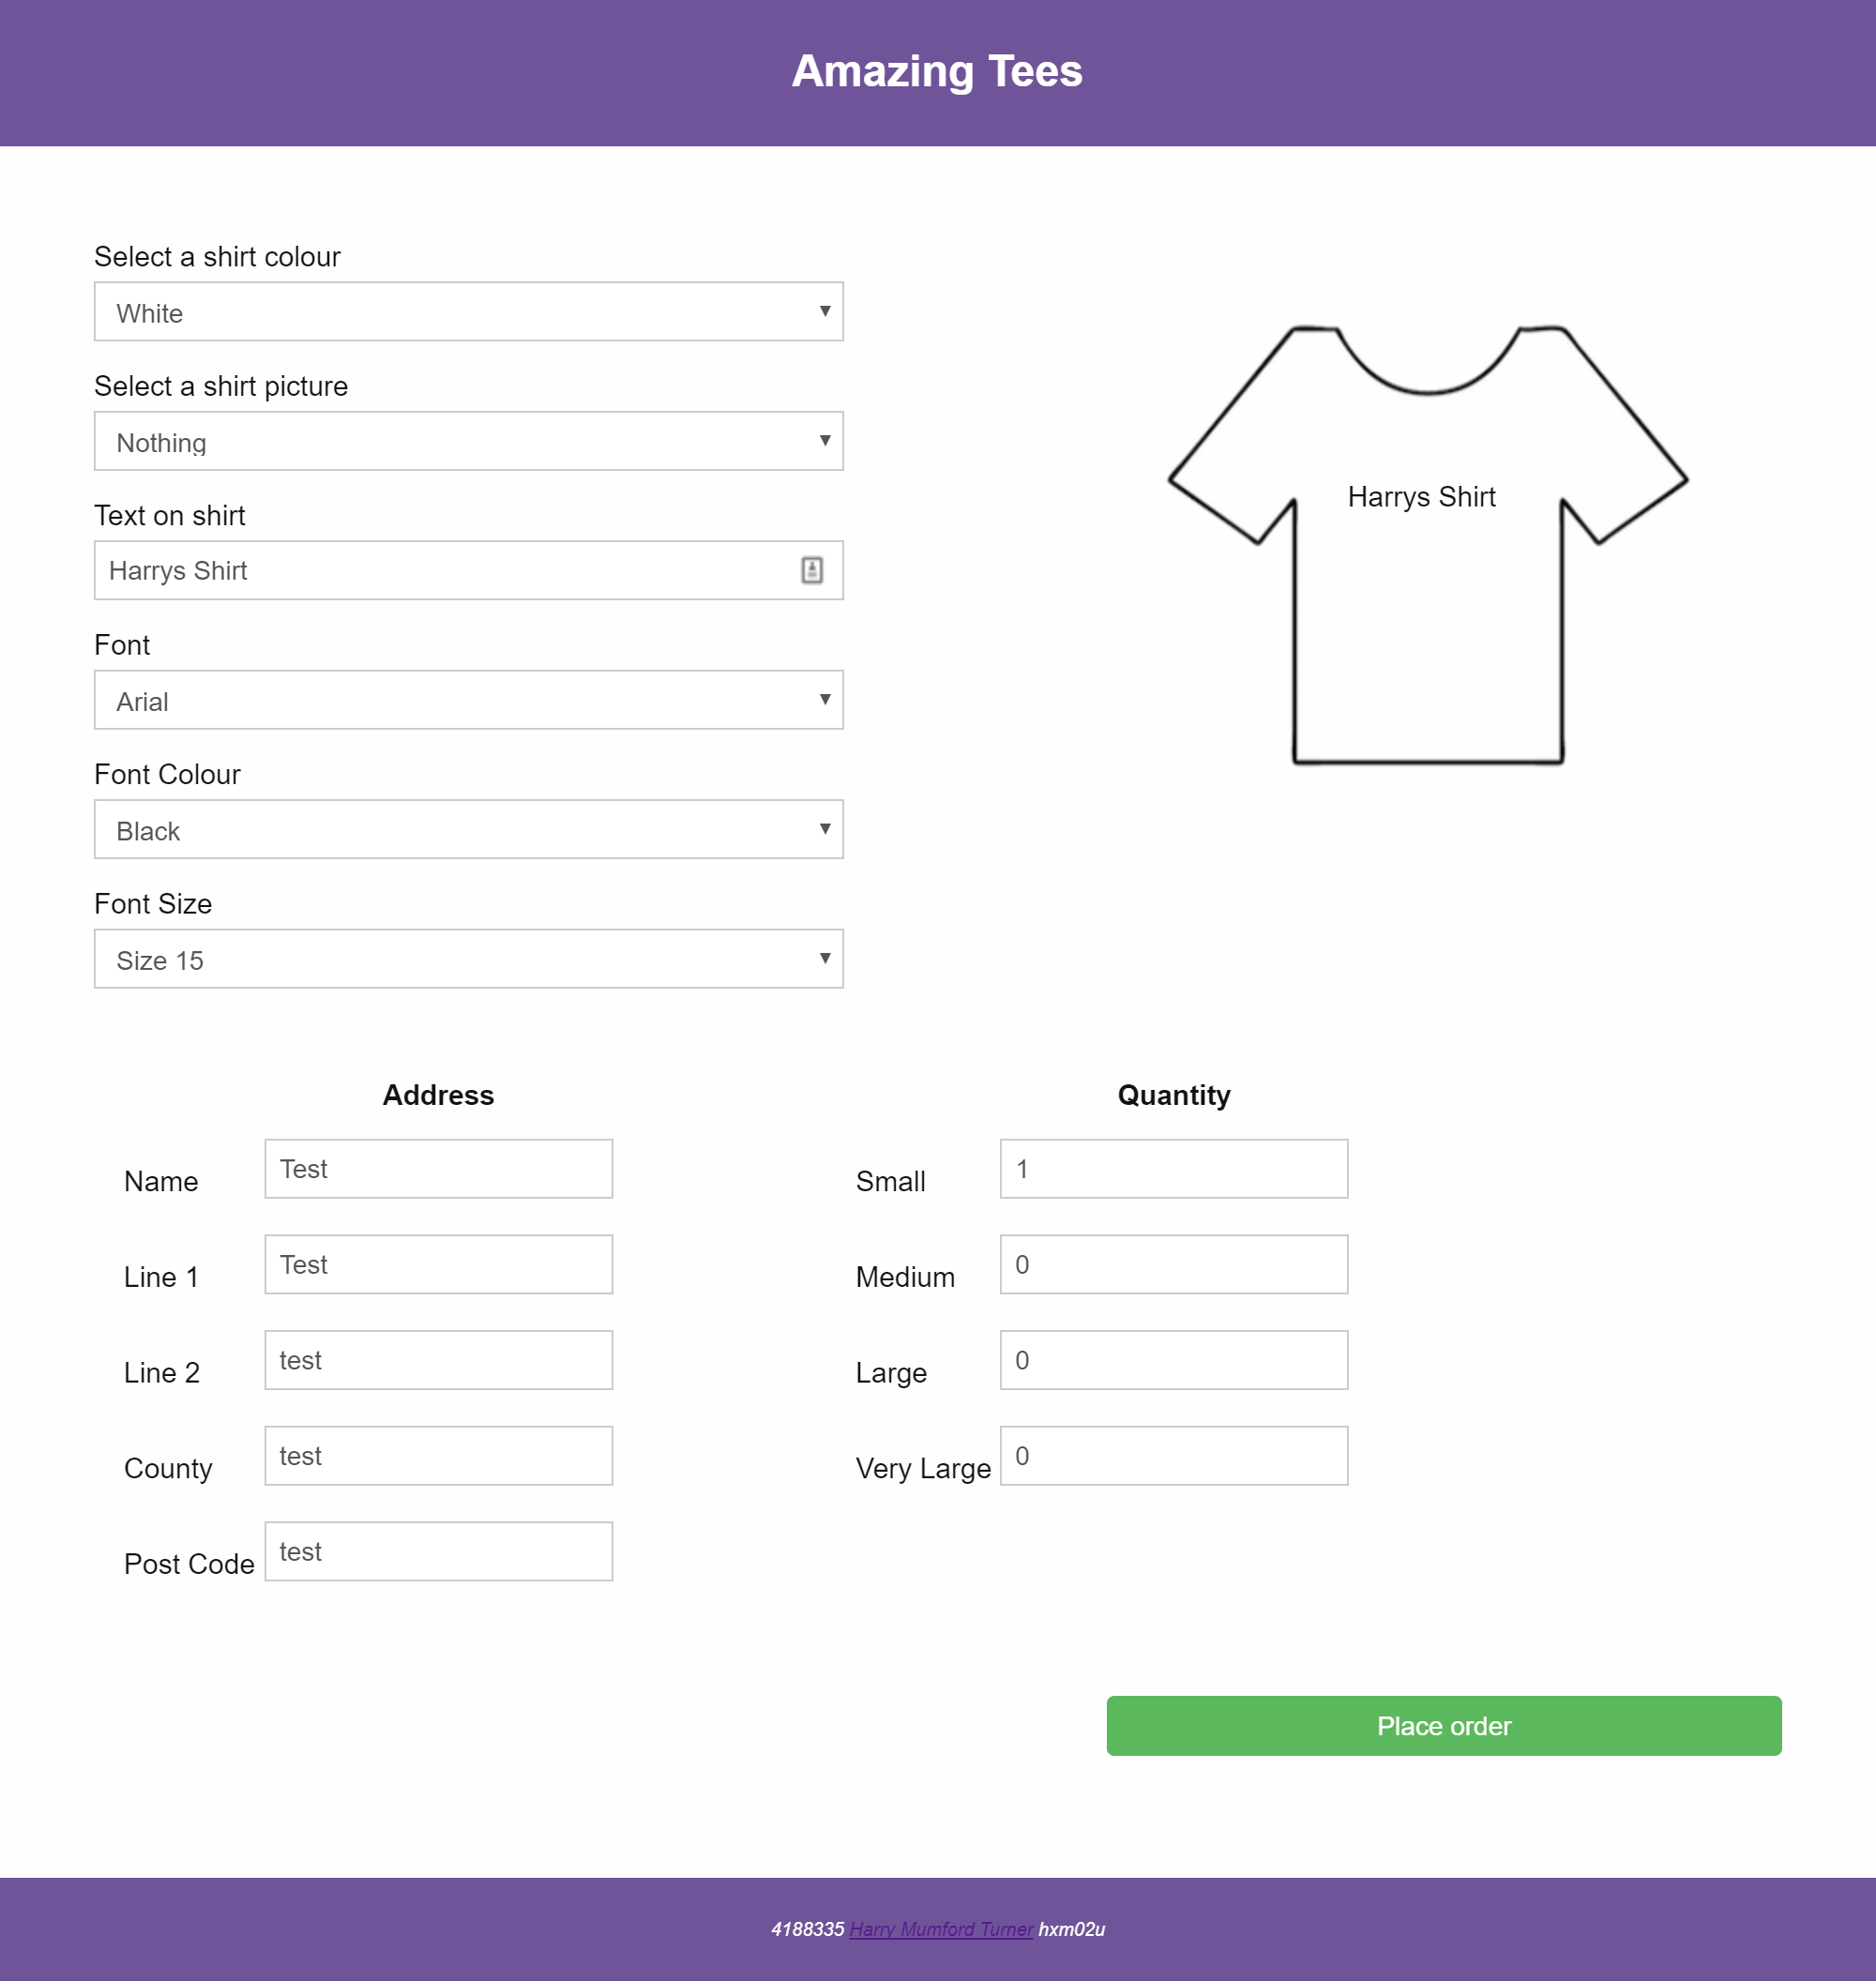
Step 10. Colors and alignment
Updated alignment of text boxes and updated colors.
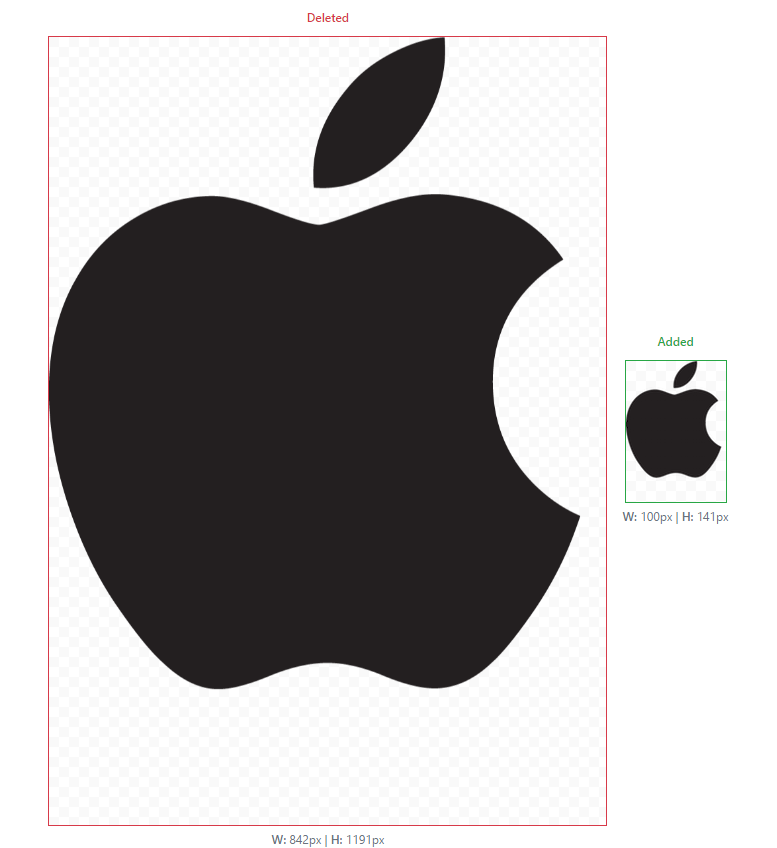
Step 11. Optimised images
None of the images used had been optimised. This Apple logo was reduced a lot, reducing load times.
Step 12. Removed inline CSS
Before:
<img height="250px;" width="300px;" class="tShirt" id="js-tShirt" name="tShirt" style="background:url(img/tShirt.png)">
After:
<img class="tShirt" id="js-tShirt" src="img/tee-outline.png" height="250" width="300">
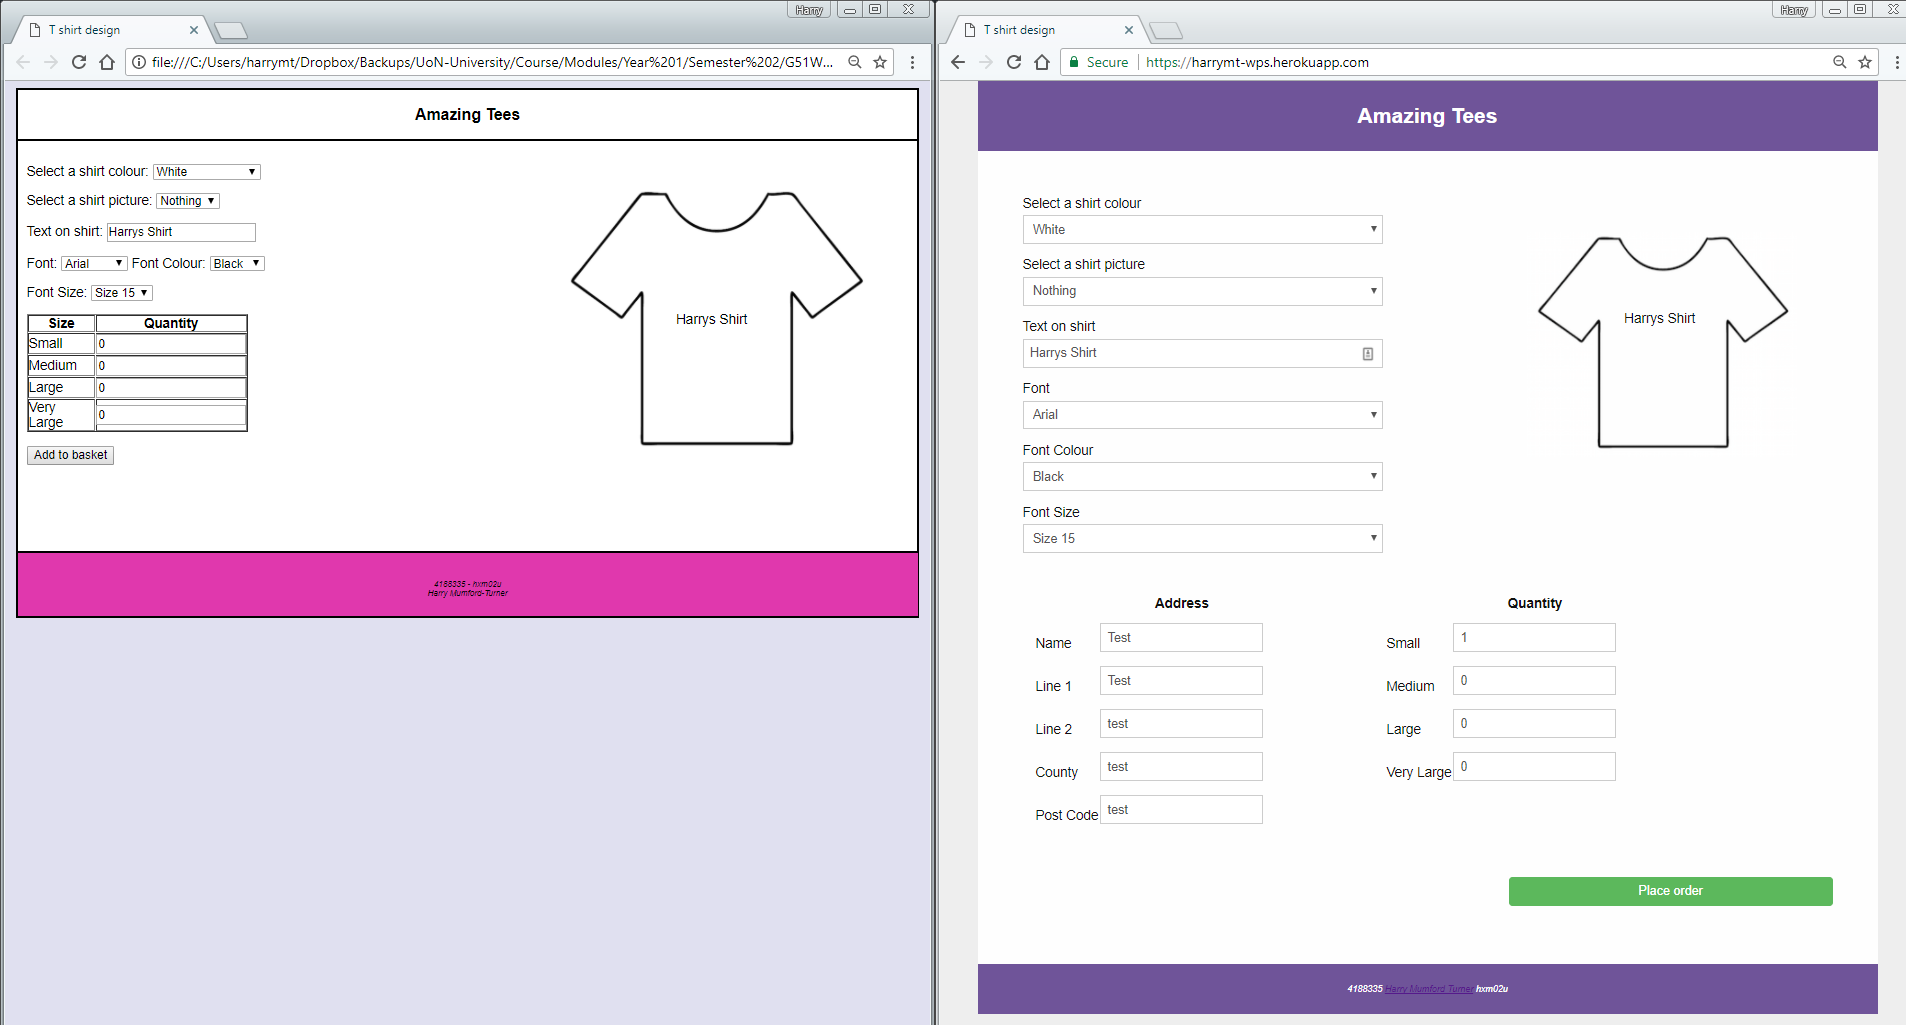
Demo
There were so many things I spotted to easily change about this site. It is interesting to come back to my first website I created and improve it.
There are so many more steps to improve this site, such as making it responsive, improving the padding for some labels, styling the final order box and much more.
I normally host my side projects on GitHub pages, but because it doesn’t support PHP, I decided to host it on Heroku for people to see.
Demo: https://harrymt-wps.herokuapp.com/
Source code: https://github.com/harrymt/WPS
Suggested
- Track mailto and tel clicks in Wordpress with Google Analytics — 10 November 2017
- Solving Google Interview Questions — 24 November 2017